
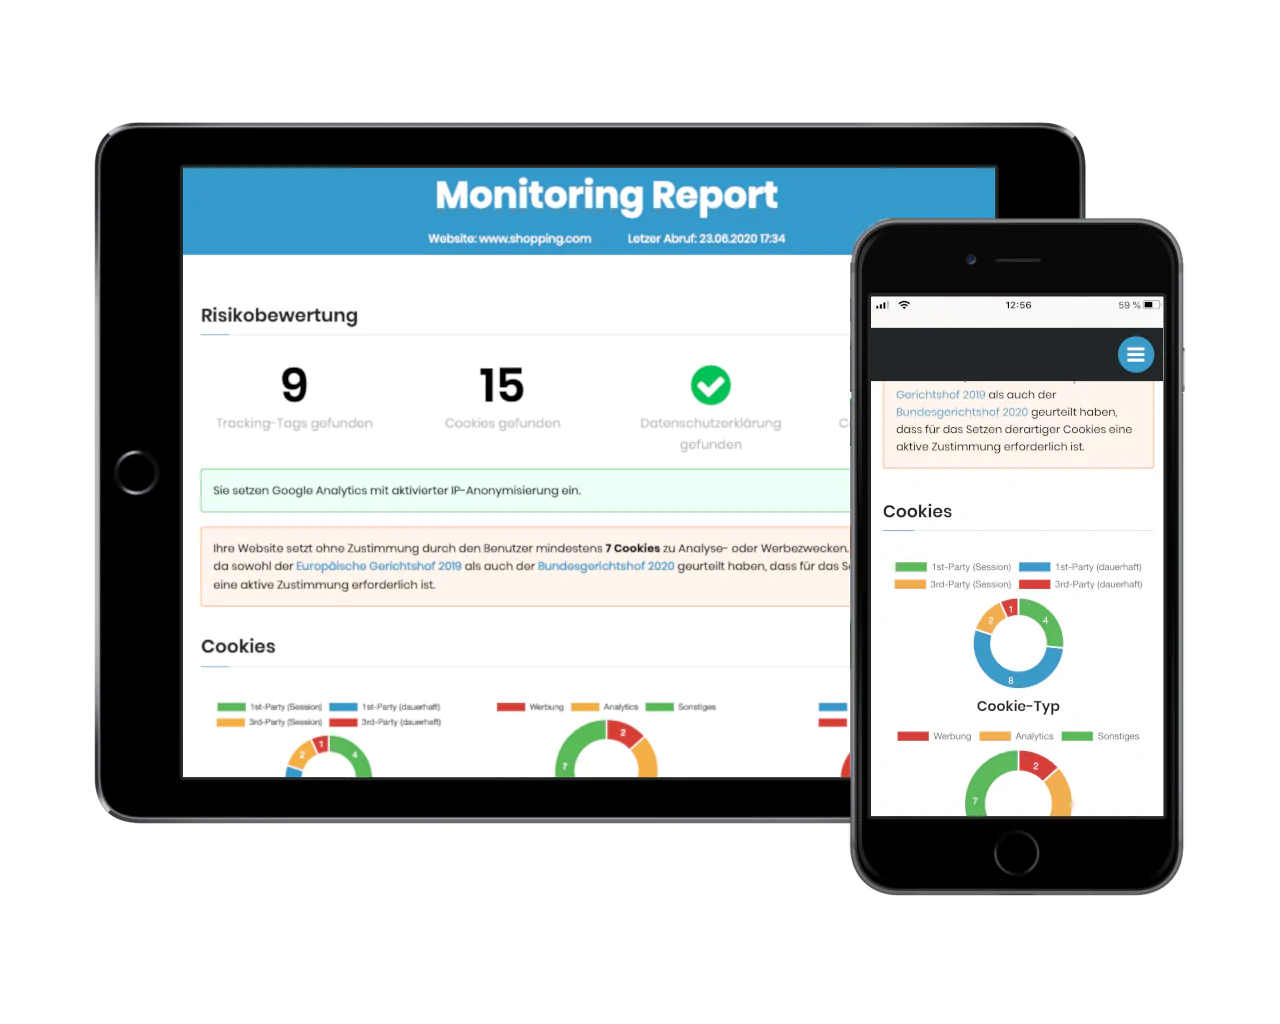
Scanning a website for illicit use of external services is not very difficult, since every web browser has built-in developer tools that can be used to detect snooping services (this is fully described in our e-book ).
Mobile apps are a bit different - they also use external services, but this goes under the radar of most privacy advocates, because it's less obvious how to investigate apps (and that it's even possible). So in this article, you'll learn the following with detailed step-by-step instructions:
- What inexpensive software you can use to examine an app
- How to configure your iPhone to monitor all network calls through this software
- Finally, how you use it to identify the external services that the app uses
- And what data protection violations we found using the example of the Miles & More app
We will first focus on iPhone apps and look at Android in a separate article, because the Android platform has certain technical peculiarities.
Step 1: Redirect traffic
In normal operation, an app accesses the Internet either via a WLAN or the mobile network. For our review, we interrupt this direct connection and insert a so-called "intercepting proxy" in between. This proxy (which runs on your desktop or notebook) then allows us to detect individual network calls and, through them, prove the data transfer to external services.
To start, you need a WLAN network that your smartphone can connect to, and your computer must use the same network (e.g. be logged into the same WLAN hotspot - but a wired connection will also work).
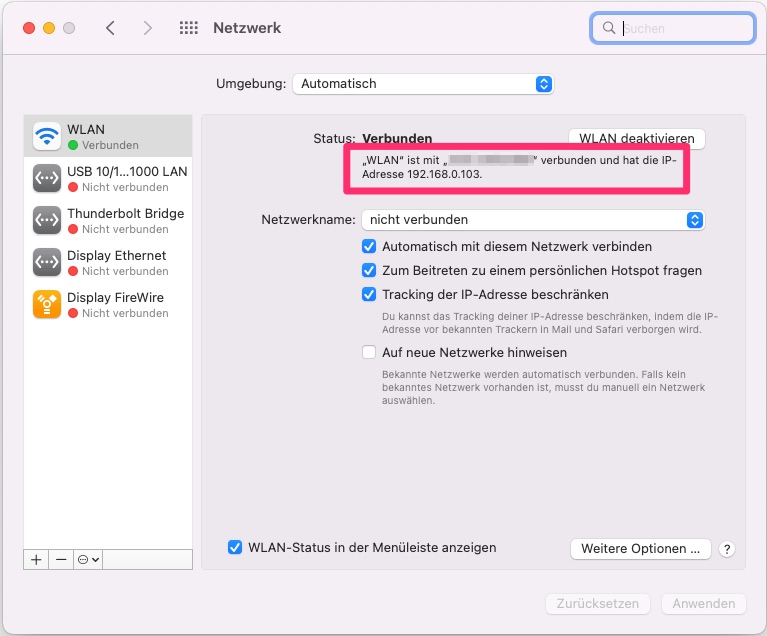
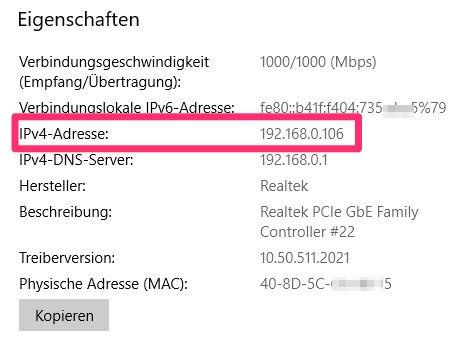
The first step is to find out the IP address of your computer. If it is a Mac, you can find this information in the Control Panel under "Network". If it's Windows, open the "Network Properties" item in the Start menu:
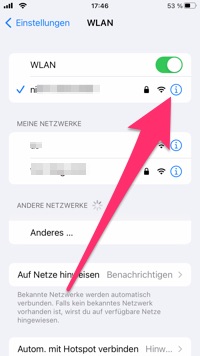
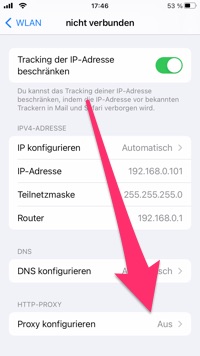
You can now use this IP address to force your smartphone to route all traffic through your computer. To do this, open the iPhone's settings and select the "WLAN" item.
Click on the info icon next to the currently connected WiFi hotspot.
Go to the bottom of the dialog and select "Configure Proxy".
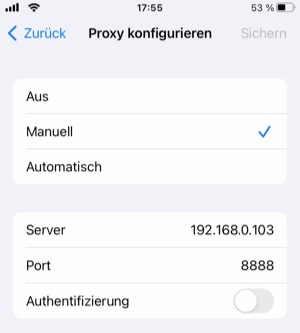
Enter the following information there:
- Switch from “Off” to “Manual”
- For “Server” enter your computer's IP address
- For “Port” enter 8888
- Don't forget to confirm with "Save" at the end.
Your iPhone is now no longer connected to the Internet - we have to install the proxy in the second step.
If you want to use your iPhone "normally" again, don't forget to call this dialog again and switch from "Manual" to "Off", and save. Because as soon as you turn off your computer, otherwise your iPhone would no longer have a connection to the Internet.
Step 2: Install Charles Proxy
There are several tools that can be used as an intercepting proxy. I myself use the commercial product "Charles", because it has the advantage of being easy to use and available for both Windows and Mac. There is a free trial version, the full version costs an affordable $50. Download the installer here and follow the instructions for installation: https://www.charlesproxy.com/download/
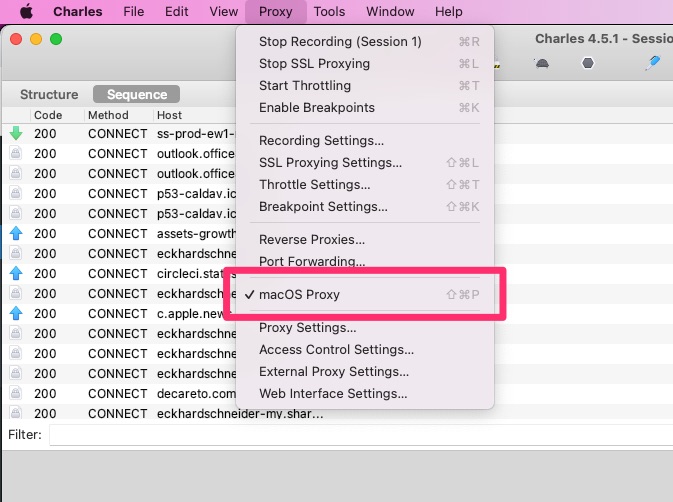
Immediately after installing, you will already see network requests coming in and being displayed. This is because Charles automatically redirects all network traffic from the Mac or Windows computer as well, which is rather annoying for our purpose. Therefore, click on "Proxy" in the menu and uncheck "Windows Proxy" or "macOS Proxy".
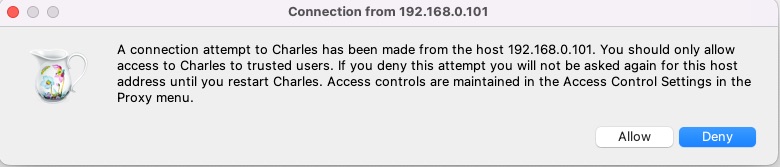
If you now use an app in the iPhone (such as Safari), then Charles first shows a warning dialog. Click on "Allow" to allow the smartphone to access Charles.
Now you should be able to see additional requests entering the list - but the app will probably display errors on the smartphone and not work correctly. The reason for this is that an intermediary proxy is classified by your smartphone as a "man-in-the-middle" attack, as is also used by hackers. SSL certificates were developed to fend off exactly such attacks. You therefore need to get your smartphone to trust the Charles proxy, or more technically, you need to add the Charles root certificate to the trusted certificates in the iPhone.
Step 3: Trust the Charles Root Certificate
You can also find a description on the Charles website ( https://www.charlesproxy.com/documentation/using-charles/ssl-certificates/ ), we walk through the process step by step here:
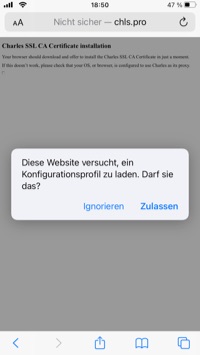
Open the URL https://chls.pro/ssl in Safari on the iPhone . A download dialog opens for a configuration profile, which you must confirm by clicking on "Allow".
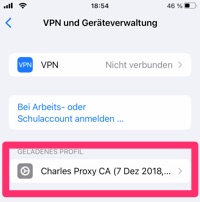
Then switch to “Settings”, and there to “General / VPN & device management”. From there, click on Charles Proxy's loaded profile.
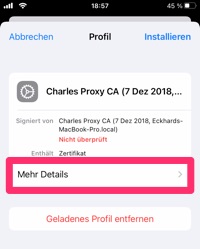
Click on “Install”. You must then enter the device code and then click on “Install” again in the dialog that appears.
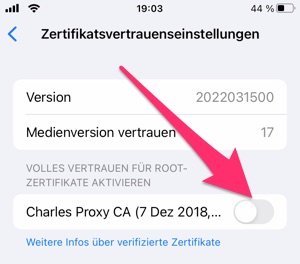
Then go to “Settings / About / Certificate Trust Settings”. Click on the slide switch for "Charles Proxy CA" so that it turns green and then click "Next" in the warning dialog that appears - this completes the configuration on the iPhone side.
Step 4: Configure Charles Proxy
A few settings must now be made in the Charles Proxy so that you can use Charles optimally.
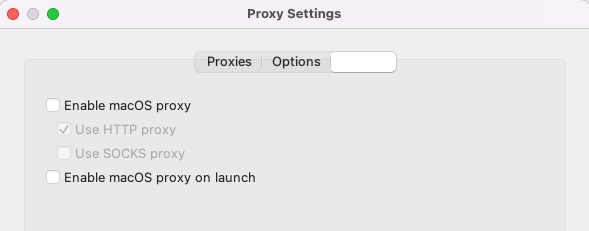
In order to prevent network access to Charles' computer from being displayed, first open the “Proxy / Proxy Settings” menu item in Charles. Click on the “macOS” or “Windows” button there.
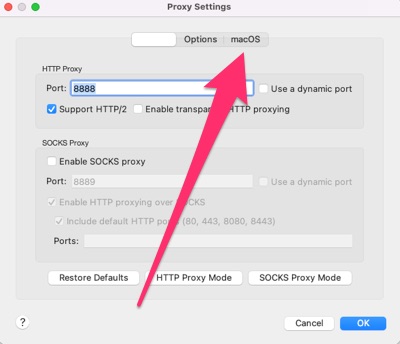
Remove all ticks there.
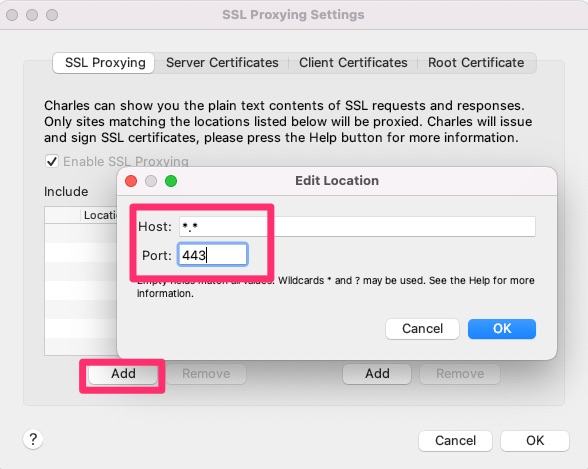
So that you can see the details of the SSL-encrypted network access, open the menu item “Proxy / SSL Proxy Settings”. From there, click the “Add” button and in the small dialog that pops up, type in the input as shown in the image below. Confirm with OK".
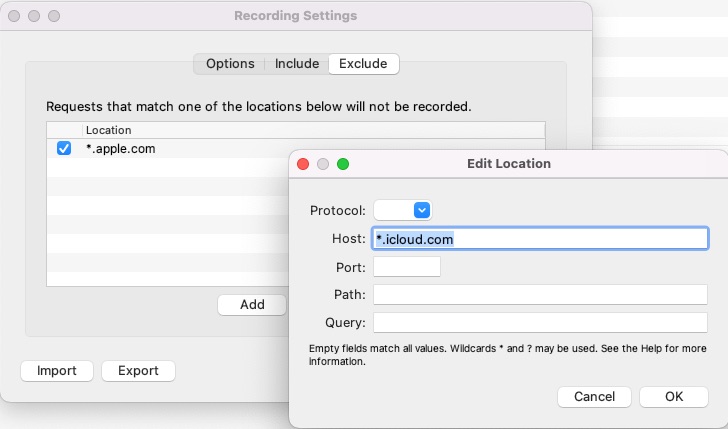
Then open the menu item “Proxy / Recording Settings / Exclude” so that disruptive accesses of the smartphone to Apple servers are suppressed. Add two entries there for *.apple.com and *.icloud.com by clicking on “Add” and filling out the dialog as shown in the image below.
Step 5: The Charles Proxy interface
Now it can finally start. At first glance, the Charles Proxy interface looks very technical and therefore daunting, but you can limit yourself to a few points.
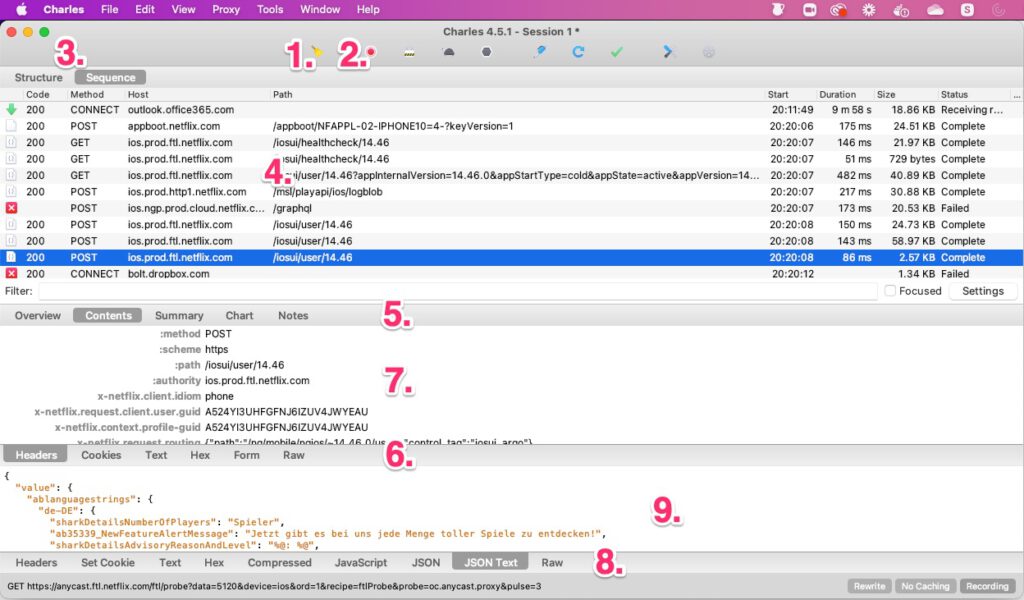
- Clicking on the broom icon empties the list of requests. This is useful for keeping track of a test session.
- Clicking on the red circle stops the recording, another click starts it again.
- This switch toggles between two ways of displaying the incoming requests. In our example, we leave the switch on “Sequence” because then the chronological relationship is easier to recognize.
- At the top of the content pane is the list of network requests, with older ones at the top and newer ones at the bottom. The "Host" column is the most relevant for the evaluation.
- This menu bar allows different ways of displaying the results. It appears as soon as a request has been selected by clicking on it (blue background in the screenshot). It is best to select “Contents”.
- – 9.: If you have selected “Contents”, then the contents of the network request and the response from the server are displayed here. The display format can be selected in menus 6. and 8.
Some practical tips
- At the start, observe whether network requests come in without the iPhone being connected to the computer by undoing the proxy settings from step 1 in the iPhone menu “Settings / WLAN” and setting them to “Off”. Clear the list and wait a moment. No other requests should appear in the list - this way you can ensure that no calls from the computer get between those from the smartphone.
- You can probably only install apps from the Appstore if the proxy settings in the iPhone are set to "Off" (at least that's how it is for me). So firstly, download the apps you need and then configure the proxy in iPhone as described at the end of step 1.
- Unfortunately, it is not possible to only monitor the network traffic of a specific app, rather in Charles you can see everything that is accessed from the smartphone overall. You should therefore first close all apps and observe which calls the smartphone still makes - for example because e-mails are retrieved automatically.
- You have to view the results with a certain degree of skepticism, because requests to the mail server or similar can intervene at any time. It is best to repeat an examination to verify results.
Step 6: Examine an app
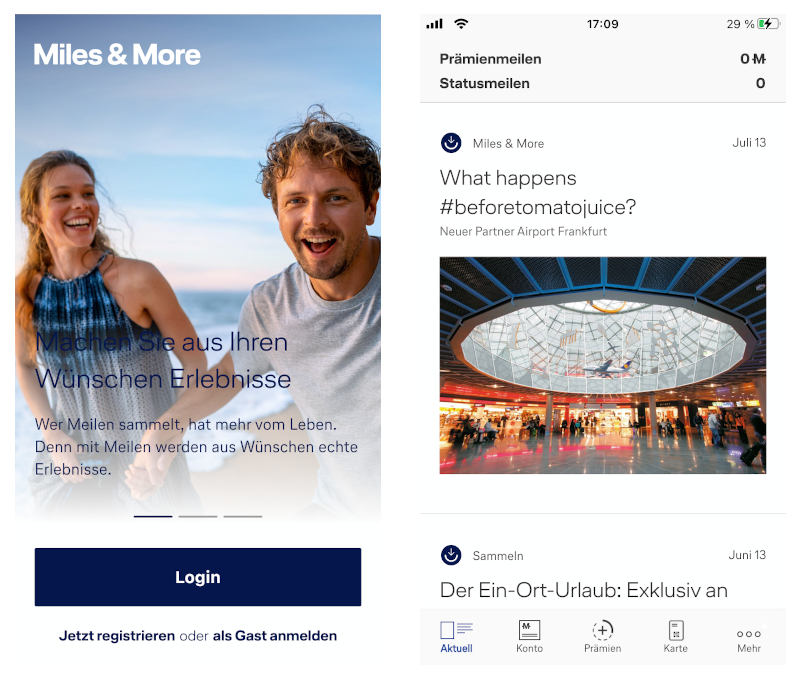
After the admittedly somewhat cumbersome preparation phase (which luckily you only have to go through once) you can finally test a mobile app. As an example, we look at the Miles & More app from the Lufthansa Group in this article.
To do this, download the app from the Appstore (if you don't already have it), but don't open it yet. Then configure the proxy in the iPhone as described in step 1. so that the iPhone is connected to the computer. As a quick test, open Safari and load a page - you should see requests coming in. Quit Safari (and all other apps) again.
Now delete the list in Charles by clicking on the 1. button and open the Miles & More app. A start window appears in which you can log in as a guest. Select this option and the app will open an overview page.
Stop the recording in Charles by clicking on the red button (2.). In my case, the list now looks like this:
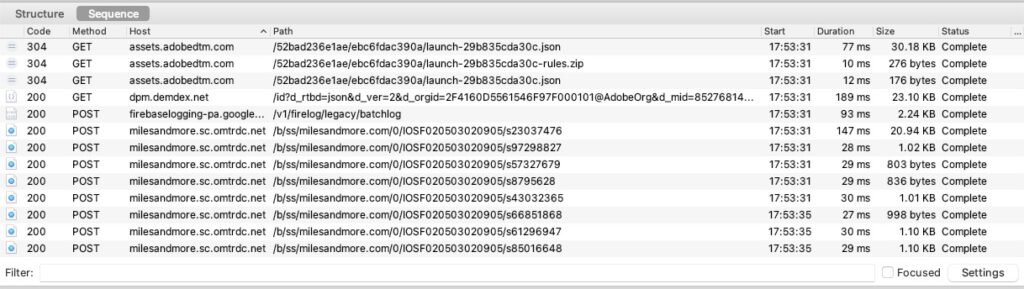
A total of 4 different host names can be seen. If we called up other functions of the app, e.g. registration, login or purchase, then more hosts would probably be added. These four should suffice for a first check.
Whether a connection to external services is established here (and to which ones) can now be determined by looking at the hosts or domains. What can be determined without further examination: The connection to the services (and thus the transfer of personal data in the form of at least the IP address) took place without consent, because no consent banner or information about external services was displayed.
Let's look at each host from top to bottom:
assets.adobedtm.com
In the browser on the computer, open a search engine of your choice (in the example I am using Google) and in the search box type “assets.adobedtm.com” with quotation marks as shown in the screenshot:

A number of search results appear on Google, including a discussion from an Adobe forum:
With a little more research, it's easy to determine that DTM stands for Adobe Dynamic Tag Management, Adobe's tag manager, comparable to Google Tag Manager. You could classify this service as "Functional", but Adobe is a company from the USA, so data is transferred to an insecure third country.
The data protection declaration is not easy to find in the app (3 clicks away from the home screen) and is spread over several pages; there is no reference to the service in the data protection declaration.
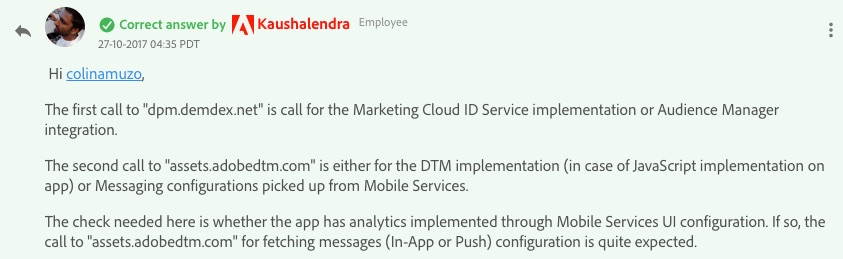
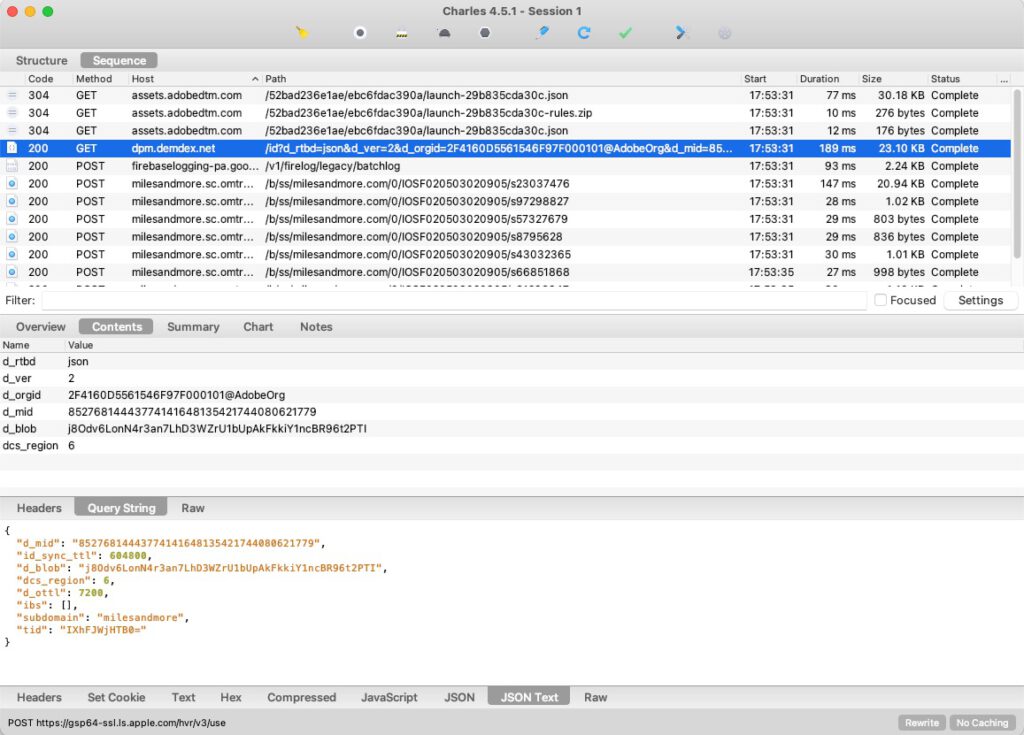
dpm.demdex.net
A similar search for this domain shows that demdex.net stands for “Adobe Audience Manager”. The following description can be found for this:
Audience Manager helps you bring your audience data assets together, making it easy to collect commercially relevant information about site visitors, create marketable segments, and serve targeted advertising and content to the right audience.
This service is therefore used for the personalized display of advertising - i.e. in no way functional, and again associated with data processing in an insecure third country. There is no reference to the service in the data protection declaration.
If you click on the call in the list, you can also see that cryptic-looking data is transferred to the service in the request, and the service responds with data (you could certainly also determine what the values mean by doing a Google search):
firebaselogging-pa.googleapis.com
As is easy to see, this call belongs to Google. Research also quickly reveals that Firebase is a suite of services for mobile app development. I couldn't find an exact match explaining this call, so I simplified it a bit and tried searching for firebaselogging.googleapis.com . There was the following hit in a Google discussion forum:

So this is about "crash detection", ie the service logs crashed apps for the purpose of quality assurance. This can be classified as functional, but unfortunately data is also transferred from the EU. There is no reference to the service in the data protection declaration.
milesandmore.sc.omtrdc.net
There is no exact match for this hostname, so we try searching for sc.omtrdc.net - which very quickly turns out to be "Adobe Analytics", Adobe's web analytics service. Not really necessary, and data transfer to the USA also takes place here. The data protection declaration provides information about Adobe Analytics, but there is no indication of the legal basis on which the processing takes place.
And what about cookies?
Saving and reading data on the end device works differently in native mobile apps than in a web browser. In the network requests, data is transferred as a "payload", which is typically stored in a database on the smartphone. However, the storage cannot be easily observed and proven with Charles.
There is one exception: an app can include a browser window, a so-called "webview". This behaves exactly like a browser, including when it comes to cookies. You can see the setting and reading of cookies in the network requests, but it's a bit cumbersome - and you can assume that in the native part, as described above, significantly more data is stored than through cookies in the web view. Since we can never see the whole picture anyway, we will not examine the cookies here.
Conclusion
The Miles & More app loads four services from the USA just by opening the start page without consent, two of which are in the area of advertising or analytics. Whether this number will increase as more features of the app are explored is open (but not unlikely). Here one would definitely expect an upstream consent banner. There is also plenty of room for improvement when it comes to fulfilling information obligations. Overall, a rather mediocre result for the Miles & More app (as of July 28, 2022).
Author: Eckhard Schneider